A garden shed should be a sanctuary. Your safe space. At its most modest, a shed is the little building in the backyard, preferably covered with vines, where you can slip off on your own to hang your hat on a hook, re-pot an overgrown scented geranium, and organize all your sharp-edged tools.
Or your shed may be grander. If your garden space allows, a shed may be expansive enough to serve as a studio: all you need is a desk, a stool, and a task light. There might be a rack on the wall for bike storage. Your shed could have electrical outlets, a tool bench, running water, heat.
We all need a garden shed for storage space, work space, or a hideaway—and wouldn’t it be nice if it also had a window to crank open to feel a breeze? Whether it’s the Perfect Potting Shed you’re after or a Stylish Lean-To for Tool Storage, or a sublime, architect-designed space that can double as guest quarters, you may wonder: What is the best design for my garden?
Use our brand-new guide to Garden Sheds for inspiration. We’ve got tips on everything from construction ideas—from poured-in-place concrete to stone, corrugated metal, or pressure-treated wood—to DIY Wooden Shed Kits to complement your landscape.
Here’s a glimpse of design ideas you’ll find in our guide to Garden Sheds:
An architect will start the design process by asking you how you plan to use your shed (the second question will be “Where do you want to site it?”), writes Janet. Read more about step-by-step garden shed design in Hardscaping 101: Garden Sheds.
Above: File cabinets and other office storage accessories are just as useful in a garden shed. Who doesn’t need some extra drawers to store seed packets, garden labels, and bits of twine?
Above: My own garden shed is miniature, a mere 18 inches deep. It’s plenty of space for tool storage (and I even have a potting bench built in.) See more at Steal This Look: My Mini Garden Shed in a Garage.
Writers’ Sheds
Above: In London’s north central Hackney, UK-based architecture firm Office Sian worked with a limited budget and the size constraints of a small backyard to design an elegant freestanding shed that functions as both a work space and a library, with retractable doors and a clear view of the garden. Photograph courtesy of Office Sian.
Above: Shropshire, UK-based florist Tammy Hall has a small studio in a former shepherd’s hut “rescued from a field at the top of the farm where it had been for years and years,” she says. “It now sits at the top of my field and is my quiet thinking space.” Photograph by Britt Willoughby Dyer.
Is coleus a plant you have to learn to love? Garden trends ebb and flow—and bright, dramatically colored foliage can be an acquired taste. I used to dismiss these tropical plants because I thought their brightly tinged leaves screamed gaudiness and were unbelievably hard to mix with other flowers. No longer. Now I think of them as plant gems that can add a burst of dramatic color; whenever I spot them I snap them up for my clients’ container plantings.
Is coleus the right plant to add to your garden beds or containers? Keep reading to find out:
Coleuses are native to tropical areas of Southeast Asia, India, Africa, Australia, and predominantly Indonesia and Sri Lanka. Knowing where a plant originates helps gardeners better understand and predict what will make it happy in other regions.
Coleus is considered a tender annual, hardy only to Zone 10, and should be incorporated into gardens with that factor in mind. But don’t despair, because in frost-prone climates coleus can be dug up, potted, and brought indoors without difficulty to be kept on a sunny windowsill through winter. Another option is to take tip cuttings in early fall to start new plants. Bonus: Coleus is one of the easiest plants to propagate. In fact, the plants root so readily that you can simply start cuttings in a glass of water.
Another good-to-know fact about coleus is that it belongs to the mint family (Lamiaceae), and possesses the tale-tale square stems and opposite leaves like its other family members. Coleus, thankfully, does not have the crazy invasive growth habit that characterizes mint and instead is well-mannered in the garden.
Coleus comes in stunning variations of chartreuse, green, pink, red, maroon, and many shades in between. Plus, some varieties are marbled or brightly edged and some are splashed. Traditionally coleus was considered a shade plant, but new varieties have hit the market which are quite tolerant of sun. With these sunny introductions plus new color combinations, habits, and even unique leaf shapes, no matter what kind of garden you have, you can find a coleus that works.
Above: Plectranthus scutellarioides thrives on the island of Maui. Photograph by Forest and Kim Starr via Flickr.
Cheat Sheet
There is a diversity of leaf color, shape, and growth habit among coleuses, making them fantastic container and bedding plants, especially tucked into shady, drab areas or as pot fillers under large shade trees. Look for the habit that you need as some grow in an upright form, others mound, and some creep or trail.
In container gardens, include a coleus with contrasting colors to offset a nearby plant.
Coleus flowers are attractive to hummingbirds and can help lure them into the garden.
Above: Two varieties of coleus complement each other in coloring and texture. Photograph by Puddin Tain via Flickr.
Keep It Alive
All coleuses need fertile, well-draining, and evenly moist soil. Newly planted coleuses especially like to be pampered with moisture.
Plant in shade or partial shade, though many varieties can also tolerate sun so read the plant label to confirm.
It is recommended that the summer blooms be pinched off when they appear because they detract from the leaf display and it is thought that the flowers cause the plant to loose vigor and slip into decline. And while the flowers are not unattractive, they are ho-hum.
Routinely pinching back the fast-growing foliage is also highly recommended to encourage branching and full, compact growth.
“Last season, this was a bare plot,” says farmer Stephen Lamberti. “There was nothing here.” Thirteen months later, this half acre on Zingerman’s Cornman Farms is a splendorous green patch with a bounty of black bell peppers, fist-sized onions, footlong summer squash, and a dozen other varieties of vegetables.
For the last 36 years, Zingerman’s, the legendary gourmet food business founded by Ari Weinzweig and Paul Saginaw in 1982, has been one of the driving forces behind Ann Arbor, Michigan’s rise as a Midwest foodie destination. It began with a deli, and then there was a bakehouse, and a creamery and a coffee company and a candy manufactory. (And yes, it is all available by mail order.)
Now, with Cornman Farms, a 42-acre spread in Dexter, about a 20-minute drive from the deli, Zingerman’s is growing organic food. The harvested crops travel only a few hundred feet to the event venue’s kitchen, where chef and co-owner Kieron Hales crafts dishes to be served at weddings, private events, and Cornman’s beautifully bucolic seasonal dinners.
The edible garden is the agricultural equivalent of a test kitchen—and at this size, it is also an ideal model for would-be backyard farmers. “This, an organic garden like ours, is totally something, even a new gardener, can do at home,” Stephen says. “And this,” he adds, “is how you do it.”
“Teaming With Microbes, in particular, will open your mind up to what’s going on beneath the soil surface, because you’re not really growing plants, you’re feeding soil. If the soil is well manicured and diverse, anything can thrive,” he explains.
2. Pick your tools.
Above: “The tools are the next most important thing,” Stephen says. “There’s really only a small list of essential tools: your scissors, your trowels, all of your basic gear.” To start, get a hose, a spade, garden shears, and a lawn rake: the rest can wait.
Above: A Hula Hoe has a stirrup-shaped head and oscillates to churn up weeds and compacted soil. It is $24.95 at Gardener’s Supply.
Tools for when you’re ready to go beyond the basics:
The Hula Hoe: “It’s great for weeding,” he says. “The hula hoe is also great for putting row crops in your garden beds. Get a four-inch hula hoe for when you’re working with plants like beets and carrots, which only have to be four inches apart. Then get a larger six-inch hula hoe to run the rows in your tomato beds.”
Hose Water Filter: Get an attachment to screw onto your hose and a filter for your water, to remove the chlorine and chloramines in tap water, “which will destroy the microbiology in your soil,” Stephen says.
3. Know your site.
Above: Hidden behind a hedge of willow and sunflower is what the Cornman crew calls “our secret garden.”
“You want to collect information on all parts of your property — north, south, east, west — because, for example, garden beds work best if they run north to south; that way, your plants aren’t shading any others out,” says Stephen.
“You should also get an idea of what you want this garden to be. What size space are you working with? How many square feet of growing area will you have? It’s about fully knowing how far you want to go with your garden project, because even if you are planning to start small, you can and should work on an infrastructure that can grow with you and your garden as things evolve.”
4. Gather your building materials.
Above: At Cornman, Stephen built much of the garden from reclaimed wood. “These beds are all made from what used to be a front fence. When I first started working on the garden, Chef Kieron had mentioned that he didn’t like that fence, so I said, ‘Well, that’s a lot of material that I can use for free.’ I love taking something that isn’t ideal and turning it into something else that is ideal.”
Old fences, old barns, your neighbor’s trash. “These are all good sources for materials that can be repurposed and used to build any of your garden structures: your composting containers, your garden beds, your trellising, everything,” he says. “I start with what I already have and let those materials dictate a little bit of the shape and size and look and feel of the garden.”
Even dead plants can sometimes become building materials. “Last summer, I had ten or fifteen sunflowers planted at the back of the garden, and they are just so fibrous and very, very strong.” He put them in the barn over the winter in a dry area and the spring used them to make teepee trellises.
5. Make your compost.
Above: Bebe patrols the garden daily with her owner.
“Right away, before you even begin building your garden, start making your own compost,” Stephen advises. “You’re going to use a lot of compost, every single year, so you may as well come up with a system at home to produce your own.
Composting isn’t expensive or difficult. “It’s a simple project that you can begin any time of the year, and you immediately start to feel that you’re getting something out of it, because now you’re using your food waste, you’re throwing away less trash, you’re reusing yard scraps and wood and materials from your home and other homes in your neighborhood,” he says.
Tip: “Always try to maintain a two-to-one ratio of nitrogen-forward materials to carbon-forward materials. The nitrogen sources will be your green stuff, your grasses, your old garden plants, even your food scraps. The carbon sources will be leaves, really thin twigs, cardboard, newspaper, those kinds of things,” he says. “And when you’re making your compost, take the time to chop things up, because you don’t want bits and pieces that are bigger than three to four inches, and you don’t want any sticks that are bigger than a half inch in diameter. Then make sure to do a once-a-week turn. Also, your compost will actively compost in a three-by-three-by-three space, so aim for a composting container that’s three feet wide, three feet long, and three feet tall.”
Another tip: Trust your nose. “You can tell by smell whether it’s working,” Stephen says. “If it stinks, there is too much green, so you need to add some more brown. And if it doesn’t smell like anything, and it’s not heating up, you don’t have enough green.”
6. Test your skills.
Above: Black tomatoes in progress.
It’s always safest to start small, Stephen says. “So if you’ve never grown a plant, ever, throw some tomatoes in a pot for a half season, then watch how it works, from when you put the seed in the dirt—that’s called direct seeding—to when you finally have tomatoes to harvest. You will learn about under-watering, you will learn about over-watering. The quicker you start making mistakes, the quicker you’ll stop making them.”
The next step: test yourself in the actual garden. “Say you have four raised beds, maybe you build them all out, but you only use one for your first season, because you want to carefully manage your effort-to-reward ratio,” he suggests. “The worst thing is putting in a whole lot of work in the beginning, and then getting behind or making a few mistakes, and then ending up with a big failure.”
7. Build your garden.
Above: The width of garden beds is a potentially tricky decision. “You shouldn’t have to reach more than a couple of feet to tend your plants,” Stephen points out. “I prefer a four-foot-wide raised bed.”
A garden can be built anywhere, but that doesn’t mean a garden should be built just anywhere. The exact location and layout is the first decision that needs to be made. Use the information that you collected (hours of daylight, shading patterns, etc.) while finding your vision, but remember to consider the simpler stuff too. “Choose a spot that’s close to your water source and close to your tool shed,” Stephen suggests.
The next step is to lay out the garden beds. “In a typical home garden, where it will be you and maybe some family members helping out, a no-dig garden bed is the best way to grow,” Stephen says. “And Charles Dowding has it down to a really simple science: When he’s building new beds, he just lays his four-by-four posts in the shape that he wants his garden, right on top of the ground and the grass — he doesn’t even dig up the grass — then he spreads compost directly on top of the grass. You could also put down some cardboard and then compost.”
Next, think vertically. “Construct your trellises before you plant anything. You will want trellising for pole beans, cucumbers, melons, gourds, all of the climbing plants. Go ahead and put those trellises in, experiment with different designs, try out different ideas, but do it early, because the last thing that you want to do is build trellising over already planted plants,” he says.
Above: “Another thing to really consider is a watering system. You can ask an experienced gardener friend or someone like me to come do a consultation on automation, because, if you can automate, you should,” he says.
8. Plant your garden.
Above: Peppers and eggplants thrive in a raised bed.
Making final plans for planting? Be sure to understand your growing zone. Get a copy of the most recent USDA Plant Hardiness Zone Map to figure out which plants grow well in your climate.
“Another good way to find out what you should be growing,” he says, “is actually paying attention when you go to your local farmers’ market. What are people selling? At what time of year? If a lot of growers at your market are selling, say, Cherokee Purple tomatoes, then it’s a good bet that means they’re a well-tested variety in your region.”
Be choosy when buying seeds. Buy organic, non-GMO (genetically modified organisms), open-pollinated, and heirloom stock. Look for seed companies that have signed the Safe Seed Pledge. Some of Stephen’s widely available favorites are Johnny’s Selected Seeds, High Mowing Organic Seeds, and Baker Creek Heirloom Seeds. “The fascinating thing about Baker Creek is they’re doing these unique, old varieties, like this King Tut Purple Pea that we’re growing, which is said to have been pulled out of King Tut’s tomb.”
Direct seeding is the best method. “Just plant right into the dirt and compost of your garden beds,” he says. “Direct-seeded plants, as opposed to indoor-raised ones, tend to thrive more, because they haven’t been disturbed or transplanted.”
Backup plan in case of bad weather? “I recommend putting a little time and money into setting yourself up with a nice early-spring, mid-summer propagation room,” he says. “Even if you decide to mostly direct seed, setting yourself up with some backup seeds in a tray will help you. Say a tomato plant doesn’t come up right, you can immediately replace it and you won’t feel like you’ve lost any time.”
9. Brew your compost tea.
Above: Basil grows in abundance at Cornman Farms.
“I haven’t fertilized these beds at all,” Stephen says, hooking his thumb toward Cornman’s overflowing secret garden. “I just use compost teas. There are a lot of organic fertilizers, but they’re not necessary if you’re following sustainable, microbe-forward practices. I’ve always found that if I’m regularly using compost tea, there are very, very minimal pest problems, and you get a much more forgiving garden.
“Making compost teas is essentially creating— with dechlorinated water, oxygen, and a food source, and I use mostly molasses—an environment for the microbiology that already exists in your compost to bloom,” he explains. “In soil science and organic sustainable farming, you are feeding the soil, not the plant. By feeding the soil, you are creating a war zone of billions of different bacteria, fungi, nematodes, all kinds of creatures. It becomes this environment where these organisms are extracting nutrients from soil particles, and also extracting nutrients from all of the other organisms in the soil, and turning them into plant-available nutrients.
“I like to do earthworm casting [i.e. worm manure] teas, because it’s an easy product to get your hands on and work with. In a paint strainer bag, for a five-gallon bucket, you’ll put one to two cups of worm castings, and then if you’ve got good healthy compost, you can also throw in a cup of that. If you have bunnies or access to bunny manure, that’s also really good to use in teas because it’s not too nitrogen-forward and it’s loaded with microbes, so you’re not going to burn your plants out.
“Water first, molasses and humic or fulvic acid second, let that mix, then you dip your teabag in there. I like a quick extraction, so I leave it in there for two to three hours, then I pull the bag up. Just twenty-four hours after you started your tea, you will have a finished product, and that five gallons can get diluted with another twenty gallons of water, so you’ll have a total of twenty-five gallons of fluid total.”
10. Walk your garden every day.
Above: Next years teepee trellises?
“You want to be out there, even if it’s just with your morning coffee every day, walking through your garden, just taking a look to see if anything is out of place, if anything seems out of the ordinary,” he says.
“If you’re there in your garden on a regular basis, pulling the small weeds out, you should be relatively weed free, just picking them, here and there, by middle or late spring. It makes the job a lot easier.
“Weeds tend to be one of those things that turn people off. They feel like, ‘Wow, I can never get in front of this.’ But your garden soil is probably riddled with seeds, and every time that you dig, you are bringing up more seeds, so it really is a never-ending struggle, and your best defense is consistent weeding and no-dig beds.”
Landscape edging is the paintbrush of garden designers—and one of their best-kept secrets. Just think: Where would a Roberto Burle Marx garden be without edging? A buried strip of metal or rubber edging (preferred over breakable plastic) keeps garden beds, lawn, gravel, and pathways defined and intact. Here are our favorites.
Above: A 5-meter roll of Corrugated Sheet Metal Lawn Edging is made of bendable, highly stable galvanized sheet metal with a thickness of 0.5 meters and height of 20 centimeters; €32 at Manufactum.
Above: The Aluminum Landscape Edging in Black is comprised of four 6-foot, slide-in, corrosion-resistant aluminum pieces made from recycled material; $64.39 on Amazon.
Above: A simple 3-millimeter-thick Rubber Edging Strip is made of heavy recycled rubber and designed for separating beds, paths, and lawns (but not for separating different heights); €24.80 at Manufactum.
Above: The Col-Met Steel Landscape Edging is made of commercial-grade 12-gauge powder-coated steel edging that comes with a bundle of four 12-inch stakes; $135.99 each at A.M. Leonard.
Above: From Sound Metals, the Simpledge Lawn Edging is designed as a seamless construction and comes in light, medium, heavy, or custom steel. Contact Sound Metals for price and ordering information.
Above: The Edge Right Hammer-in Landscape Edging is made of 14-gauge Cor-Ten steel that can be left to patina or be sealed. In comes in sizes ranging from 2 feet ($34.99) to 20 feet ($149.99) on Amazon.
Above: The Tradewinds Bordurette Landscape Edging is the most decorative of our picks. It’s “classically ornamental,” as the company says, easy to install, and maintenance-free. Available in seven styles (shown in “Spring”) from Tradewinds; contact for price and ordering information.
Above: From Coyote Landscape Products, the PerfEdge edging comes in black (shown), brown, galvanized, and green and is available in a 16- or 20-gauge steel. Contact Coyote for price and ordering information.
Above: The simple Galvanized Steel Lawn Edging is a flexible, rustproof, interlocking edging that sets into a narrow groove with angles up to 90 degrees; €10 for a single section from Manufactum.
Above: EverEdge Classic Lawn Edging is made of 1.6mm-thick galvanized steel that comes in slate, black, galvanized, Cor-Ten, and green; £36 for a 1-meter length at EverEdge.
Above: Another style from Sound Metals is Lawn Screen Edging which allows water to flow and drain through its perforated base. It has a teardrop roll top and flexible shape, and comes in light, medium, heavy, or custom steel in gray or green. Contact Sound Metals for price and ordering information.
Above: The Vigoro EcoBorder 4-Foot Black Rubber Landscape Edging is made of recycled tires and comes in black, brown, gray, green, and red; from $70.60 to $80.71 for a six-pack of 4-foot lengths at The Home Depot.
Purple has presence. It’s the color of courage on a military medal awarded for a soldier’s bravery. It was the color of power, on emperors’ royal robes in ancient Rome.
And in the garden? Purple is the first color to draw the eye, focusing attention on its deep, rich warmth. Mix and match it with as many yellows, oranges, pinks, or whites as you want, but you’ll still think that what you’re looking at is a “purple palette.”
What’s surprising about purple is how little it takes for it to be the dominant color in a garden. What we’ve noticed lately: purple on its own. A single variety of flowering purple plant against a backdrop of green? Now that’s a purple garden.
You can see what we mean with the examples below (including one exception that proves the rule), rounded up from our Gardenista archives. Here are nine purple palettes to add courage, power, and warmth to a garden.
Flowering Chives
Above: Purple flowering chives complement the silvery hues of a weathered board fence (spotted via Swedish-German real estate site Fantastic Frank).
“Native wild lupine (Lupinus perennis) is in decline in New England (and no longer exists at all in Maine), which is particularly concerning because it is the primary or only food source for the caterpillars of many endangered butterflies, including the Karner Blue,” writes Justine. Read more about efforts to propagate native species at Walk on the Wild Side: A New England Woodland Garden.
Above: A closer look, lupine and daisies. Photograph by Justine Hand.
Above: In Courtney and Zach Klein’s garden in San Francisco’s Mission district, a morning glory “volunteer” is an offshoot of a parent plant located on the sidewalk side of the house. A determined tendril found its way under the house and came up the other side, in the backyard. Photograph by Matthew Williams.
Above: Furry Pennisetum alopecuroides (also known as Chinese fountain grass) has deep purple hairs (which help to broadcast the plant’s seeds) and creates a hazy drift of color in Osaka. Photograph by Harum.koh via Flickr.
Above: Purple Russian sage is complemented by Stipa grasses and silvery artemisia in a perennials bed in northern Italy. Photography by Dario Fusaro via Cristiana Ruspa.
Salvias come in many colors, including blue, lavender, and white, but for drama and emphasis in a garden it is difficult to overlook the deep purple of S. nemorosa ‘Cardonna’. With only a few colorful spikes, it makes a major statement. See more of this garden in Before & After: A Modern Courtyard Garden for a Historic Home.
Allium
Above: In Concord, Massachusetts, a revolutionary landscape pays homage to the town’s conservationist spirit with a pergola made from black locust trees harvested on site and milled locally. A densely planted cluster of purple Allium ‘Globemaster’ provides color and seasonal interest in the areas closest to the house. Photograph by Justine Hand.
Above: A closer look: alliums, salvia, and peonies. Photograph by Justine Hand.
Aubretia
Above: Purple aubretia grows over a stone wall in early spring. Photograph by Britt Willoughby Dyer.
“Nicknamed rock cress, aubretia is a staple of old-fashioned gardens, planted in old-fashioned color combinations, where primary colors jostle for attention. Planted as a monoculture, it is an elegant thing,” writes Kendra. Read more in Gardening 101: Aubretia.
Above: A closer look: the vibrant purple gem tone of aubretia is intensified by the matte gray stone that frames it. Photograph by Britt Willoughby Dyer.
Winter’s greatest luxury? Flowers in bloom. Forced bulb season is officially underway. To celebrate, we’ve rounded up 10 flowering bulbs—including snowy paperwhites, amaryllis, hyacinths, and tulips—to coax into early bloom by the time the holiday season arrives. (All of our choices will arrive pre-chilled and ready to flower.)
For tips about how to persuade bulbs to bloom indoors in winter, see Forced Bulbs: A Primer.
Amaryllis
Above: A white Amaryllis ‘Matterhorn’ will reach a height of 18 inches or more and is $18 per bulb at White Flower Farm. Pre-order now for November shipment.
Tip: If an amaryllis bulb has started to sprout during the shipping process, don’t worry if the growth is a pale, ghostly white; it will turn green within a few days of exposure to sunlight.
Above: Imported from Holland, an Amaryllis White Nymph bulb with double white blossoms is $18.50 from Longfield Gardens.
Growing Instructions: Planted with a mix of tulip, hyacinth, and muscari, the cachepot should be placed in a warm, sunny spot in a cool room. Water when the soil feels dry to the touch (push aside the moss to test the dryness).
Growing Instructions: “Place bulb upright in bright or direct sunlight,” advises retailer Terrain, choosing a spot protected from cold drafts or hot air. “Bulb does not need to be watered to initiate growth; may rot if kept too wet.”
Hyacinth
Above: A selection of Hyacinth bulbs are on sale for prices ranging from $13 for 10 to $22.10 for 20 at Longfield Gardens.
Growing Instructions: Place in indirect sun and water only if the vase or bowl is dried out completely.
Growing Instructions: “When potted up and grown on indoors, the bulbs in this collection will create a bright and cheerful display that can be used to dress the Christmas table. Once flowering has finished, they can be planted outside, where they will go on to flower year after year,” notes the retailer.
Paperwhite
Above: Paperwhites are $2.95 apiece or, if you buy more, three for $4.95 or five for $7.95 at Garden Goods Direct.
Above: A bag of 10 Paperwhite ‘Ziva’ bulbs is $19.95 (also available in quantities of 20 for $31.95 and 50 for $64.95) from Eden Brothers. Photograph via Terrain.
Growing Instructions: You can force bulbs in water (suspended in a vase) or in soil or stone (choose a container deep enough to accommodate at least one inch of root growth).
Above: Sourced from Irrael, a 10-count bag of fragrant white Narcissus Tazetta Ziva bulbs is $10.50 from Longfield Gardens.
Growing Instructions: Plant bulbs six inches deep in soil or place them in a shallow bowl on top of a layer of pebbles. Keep roots moist but not soggy; flowers will bloom in four weeks.
Above: A large metal cachepot planted with 36 bulbs, a Spring Sonata Bulb Collection is $79 from White Flower Farm. Pre-order now for December shipping.
You know how no one ever tells you the messy truth about pregnancy and childbirth? That’s also how I feel about gardening. No one ever explained to me how physically hard it can be or how weeds don’t go away completely just because you pulled them out by the roots. And definitely, no one ever took me aside to warn me that a significant number of my new plants might not come back next spring.
Someone should invent hardy flowers that, once planted, will, in addition to reliably blooming year after year, multiply on their own. Wait, what? Mother Nature has already invented this? I should plant bulbs that are good for naturalizing? What does that mean? And why didn’t you tell me this before?
Why are some bulbs labeled “good for naturalizing?”
When you go to the nursery this fall for spring-blooming bulbs, you may find that some are labeled “good for naturalizing.” What does “naturalize” mean? Used as a verb, as in “I’m going to naturalize some bulbs this weekend,” it means to plant perennial bulbs in a way that makes your garden look informal and wild (as nature intends).
Used as an adjective, as in “Can you buy some naturalizing bulbs on your way home today?” it describes plants that, once established, will not only return every year but also bring along friends. Yep, without any effort of your own, they will come back in greater numbers. (These types of bulbs are sometimes also called “perennializing.”)
It can also be used as a noun, as in “I love naturalizers like daffodils in the garden, don’t you?” You should consider naturalizing bulbs if you don’t mind the look of flowers popping up helter-skelter, if you prefer unstructured, soft gardens over more formal ones, and if you like the idea of free flowers.
Yes, by definition. But in practice, some bulbs, notably many tulips, are finicky and require optimal soil, water, and light conditions in order to thrive. (Tulips are native to Central Asia and Southern Europe, but many cultivated tulip varieties sold in the US will not naturalize.) Most American gardeners treat tulips more like annuals, as they tend to peter out after the first season.
First, choose bulbs that are labeled “good for naturalizing.” (Go here for a good list of naturalizing bulbs.) Daffodils, crocuses, snowdrops, and some alliums and heirloom tulips—also known as “species” or wild tulips—are ideal candidates. Second, select a spot in your yard that has good drainage, enjoys at least four to six hours of sunlight, and doesn’t get foot traffic. Third, figure out the general size and shape (preferably curved and asymmetrical) of your natural plant colony; consider using a garden hose or rope to map out the area. Then, literally scatter your bulbs within the border of this space and dig holes where they land. Add compost as you plant the bulbs and water well.
In the spring, the flowering plants don’t need much attention. The key, in fact, is to leave them alone. After flowering, the foliage on naturalized plantings should be allowed to die back on its own (which can take as long as eight weeks). The foliage that’s left after flowering isn’t particularly attractive, but it’s the secret to a strong showing next spring; even though though the plant looks spent, the leaves are capturing sunlight to recharge the bulb.
This tweet just in, from the hungry birds in your garden: What’s for dinner?
One answer they may not be expecting: apples. We’re admiring a Scandi-designed simple brass hook called the Apple Holder, which makes it easy to dangle fruit from a tree limb or an eave.
Maybe you are wondering if birds actually like fruit? For that answer, we turned to the National Audubon Society and learned that some birds are “fruit specialists.” The group includes robins, waxwings, bluebirds, and mockingbirds, who “rarely eat birdseed,” the society notes.
Here’s to the fruit specialists:
Above: The brass Apple Holder, by Scandinavia-based designers Ahnlund-Karlen, has a round screw-on finial to hold an apple in place; $40 NZ at Garden Objects.
Designers Anna-Ella Ahnlund and Åsa-Karin Karlén met as students at Beckmans College of Design in Stockholm, where they both studied textiles and ceramics.
Above: The Apple Holder measures 14.5 centimeters long (about 5.7 inches) and has a hook at the end to make it easy to hang it from a branch or an eave.
A tip from designer Åsa-Karin Karlén: Take a bite out of the apple before hanging it up to make it easier for birds to eat the fruit.
Another online shop that stocks the bird feeder is Mysfacktor, where an Äppelkrok is 149 kr.
In the dead of winter is there anything more uplifting and satisfying than the sight of the first spring bulbs poking up through the lawn or in a few pots? If you add the delicate dwarf Iris reticulata to the mix, not only will you have flowers from late January, you also will have a delicious palette of rich colors to choose from—from ultramarine to the softest ice blue, and from cheery yellow to sultry olive.
At designer Arne Maynard’s Monmouthshire home, early spring is lit up with vast swaths of candy box pastels as dwarf iris mingle with lemony narcissi and delicate crocus. If you haven’t yet discovered the potential of these little fuss-free flowers, then read on and prepare to be seduced.
Photography by Britt Willoughby Dyer.
What are reticulate irises?
Above: Sources to buy dwarf irises include (for US gardeners) Brent and Becky’s Bulbs, where 10 bulbs of plum-colored Iris Dwarf Histrioides ‘George’ is $4.90. In the UK, an order of 25 bulbs of rich purple Iris Reticulata ‘J.S. Dijt’ is £4.99 at Crocus.
These small bulbs get their name from the mesh-like skin that surrounds them. After their spiky quadrangular leaves emerge, the flowers will grow only to a height of about six inches. Yet other than their diminutive proportions, they are very similar to their statuesque cousins—with three “standards” (the inner upright sepals) and three outer “falls.” Many modern reticulates are hybrids of I. histrioides whose natural habitat is on the exposed mountain sides of Turkey, which is why even if there’s snow on the ground these tough little flowers will still push on through and fill the air with their delicate scent.
How should I plant reticulate Iris bulbs?
Above: Pastel shades mix well with crocuses.
Like most other iris, the reticulates like well-drained soil and a sunny position. They can be planted in grass (where they will typically naturalize over time), in borders under deciduous shrubs, in rockeries, and in gravel gardens. Plant them about three inches deep (less and they may not re-flower) and plant in early autumn so that they have time to get their roots down into the soil before the ground cools.
Above: Iris histrioides ‘George’.
UK-based garden expert Sarah Raven suggests using I. histroides ‘George’ as a colorful top layer in a bulb lasagne. Plan it well and you can have flowers from late January until May if you add the right layers of tulips to follow. Add a layer of gravel on the top to prevent slug damage and to protect the delicate flowers from being splashed with rain or soil.
A few bulbs planted in small pots are a lovely thing to grow indoors in late winter, but like many spring bulbs they need a long period of cold to prompt them into flowering.
What other flowering bulbs look good mixed with dwarf irises?
Above: Dwarf irises naturalize and mingle well with crocuses.
There are so many delicious colors to choose from, including very rich purples such as the ever-popular ‘J.S. Dijt’ or ‘Pauline’ through to soft pale blues of ‘Natascha’ or ‘Cantab’.
Above: ‘Katherine Hodgkin’ (visible at R) is a mesmerizing pale gray. For US gardeners, Iris Katharine Hodgkin is $14.25 for 25 bulbs at White Flower Farm. For UK gardeners, 10 bulbs of Iris ‘Katharine Hodgkin’ is £4.99 from Crocus.
As garden designer Arne Maynard’s garden at his home, Allt-y-bela, illustrates, dwarf irises can look extraordinary mixed with other pastels. Plant ‘Pixie’ with ‘Pauline’ and the ultra-marine ‘George’ with other short bulbs such as Crocus tommasinianus and smaller forms of narcissi, to create a sea of color across lawns and meadows.
How do I care for Iris reticulata bulbs?
Above: Bulbs that have been used in pots can be replanted after flowering in borders.
Over time, if planted in the ground, these bulbs will multiply and get congested, at which point dig them up in late summer and divide them before replanting.
This week the Remodelista editors explored trends in kitchen design (and collected tips for getting their own kitchens in order ahead of the holiday entertaining season). Here are five ideas to steal:
Oversized Pendants
Above: In a Tahoe kitchen by ABD Studio, a pair of oversized industrial lights hangs over the dining table.
“One of the advantages of refrigerator drawers is that they’re cabinet-depth, so they can be tucked in unobtrusively, freeing up other parts of the kitchen,” writes Margot. She rounds up her favorites in this week’s 10 Easy Pieces post.
High/Low Cabinets
Above: In Lisa Jones’s remodeled London kitchen, cabinets are Ikea boxes paired with custom cabinet fronts from Naked Doors. Photograph by Richard Round-Turner, courtesy of Lisa Jones.
“Lately we’ve been admiring DIY kitchen makeovers involving little more than paint applied to dreary wooden cabinets,” writes Margot. How to best tackle such a project on your own? See How to Paint Kitchen Cabinets: 5 Tips from a Master Painter.
Can a 10-episode podcast finally solve the Isabella Gardner Museum art heist? Now listening to Last Seen. (Michelle is riveted.) And, see our behind-the-scenes tour of the Gardner Museum here.
Amid rumors that Prince Harry and Megan Markle are about to move into a 21-room apartment at Kensington Palace, the royal couple may be on the verge of trading a walled garden at Nottingham Cottage (where Harry once slung a hammock) for much grander views.
The castle grounds may be somewhat grander than yours or mine, but the Kensington Palace landscape still offers plenty of inspiration for a smaller garden. Here are 10 garden ideas to steal from Meghan Markle and Prince Harry at home:
Sunken Garden
Above: Harry and Meghan announced their engagement in the sunken garden at Kensington Palace, built in the first decade of the 20th century on the site of deteriorating Victorian-era greenhouses and cold frames near the palace’s orangery. Photograph via Royal.
A sunken garden is one that is below ground level, typically surrounded by terraces to define its perimeter. At Kensington Palace, the sunken garden’s formal layout was inspired by the Tudor pond garden at Hampton Court Palace, which was built for Henry VIII in the 16th century.
But a sunken garden also offers modern, environmental benefits: it can collect rainwater to prevent runoff and conserve water in a dry climate.
Tree Tunnel
Above: Surrounding the sunken gardens is a raised terrace walkway where red-twigged lime trees are trained on arches. Photograph by Martin via Flickr.
The covered path’s Tilia platyphyllos rubra trees, destroyed by severe storm damage in 1987, have recently been replanted as part of a £12 million overhaul of the palace grounds under the direction of landscape architect Todd Longstaffe-Gowan.
A slow-growing cultivar, theses large-leaf lime trees are known in the US as linden trees, where their ability to thrive in polluted city environments make them a popular street tree. With their pliable stems, they are excellent candidates for pollarding or pleaching.
Above: The Golden Gates at Kensington Palace. Photograph by David Huang via Flickr.
“Until recently Kensington Palace was a virtually invisible—an unloved royal backwater, set behind forbidding railings, heavily embowered with shrubs and trees, and the approach to the front door was to many potential visitors so confused and labyrinthine that few attempted to persevere,” notes Parks and Gardens UK.
During the £12 million remodel, impenetrable hedges were cut back, shrubs were pruned, and an attempt was made to make the grounds better integrated with the landscape of central London. The public entrance to the grounds “is more visible and welcoming to the millions of souls who cross the Broad Walk every year. No less important has been the removal of great swathes of clutter—including benches, dustbins, security railings, trees, and shrubberies to the northeast and southeast of the palace—to recover important and expansive eighteenth-century views over Kensington Gardens,” notes Parks and Gardens UK.
A hallmark of the design of Kensington Palace’s formal sunken gardens is symmetry; fountains are made from reclaimed water cisterns used during the 17th century.
The formality of large Italianate stone urns and statuary can be undercut (and improved upon) by the casual unruliness of a not-too-manicured trailing vine.
Purple Palette
Above: Scabiosa in the sunken garden. Photograph by Dun.can via Flickr.
Jewel-toned flowers look richer and more luxurious against the gloomy backdrop of gray London skies.
Layered Look
Above: The layered look, post-remodel. Photograph by Tredok via Flickr.
Layers of ornamental plantings, a formal style that dates to the 18th-century tenure of royal head gardener Charles Bridgeman, adds interest to a garden. At Kensington Palace, the plantings change seasonally.
Above: In springtime, layers of white flowers honor Princess Diana in the sunken garden. Photograph courtesy of Historic Royal Palaces.
In your garden, where there may be no royal head gardener (nor staff), focus on layering ornamental plants that will bloom in succession throughout the planting season: flowering bulbs in spring, followed by perennials, followed by annual flowers to combat late-summer doldrums, followed by autumn-flowering perennials.
A decorative or vintage padlock can add style to even a small garden shed or bike storage unit. For sources, consider a circa-1920s Decorative Lock & Key ($45 on Etsy) or an antique-style Lock & Key set ($20 on Etsy).
Is there any end to the inspiration we can take from English gardens? Even if you don’t live in a climate as perfectly suited to pampering a wide range of plants, there are plenty of ideas to steal from UK gardeners:
Glass garden cloches are tiny portable greenhouses you can plop atop any plant that may need extra warmth to weather the coming winter.
Popular in England since the Victorian era, metal-framed garden cloches also add a sculptural element to the garden. We’re currently admiring lidded glass cloches on offer from UK garden shop Crocus.
“This cloche is heavy, durable and built to last, with a removable lid for easy ventilation,” notes the retailer.
Above: A brass and glass Seedling Cloche has an elongated frame that is “ideal for placing over seedling rows to get them off to good start,” notes retailer Crocus; £99.99.
There are plenty of ways to keep tender plants warm in cold weather, and your garden will thank you for thinking ahead. Read more:
You would not know from walking down Roupell Street that this quaint London lane on the southern side of the Thames River was marshland in the 18th century.
Lined with two-story row houses built in the 1820s by an enterprising businessman named John Palmer Roupell, the block is now considered “an immaculately preserved enclave of Georgian architecture in the heart of Waterloo.” Maybe you have seen the street, playing a starring role as an evocative backdrop in the television series Call the Midwife?
The other day our contributor Margot Guralnick spotted a listing on real estate site The Modern House of a magical remodel—indoors and out—for a Roupell Street gem, a Rescued Georgian in a ‘Time-Capsule Enclave’ (see the interiors on Remodelista).
Today, we tour the courtyard garden…and imagine what it might have looked like 200 years ago:
Above: Granite pavers laid in a herringbone pattern repeat a theme (indoors, the kitchen floor also has a herringbone pattern).
The back of the courtyard garden opens onto the street behind Roupell.
Above: If you want to transform a wire or metal basket into a planter for a mossy arrangement, see our post 10 Easy Pieces: Wire Harvest Baskets.
Above a brick wall, a close-clipped hedge adds an additional layer of privacy without making the garden feel claustrophobic.
Above: A window above the sink in a remodeled kitchen by Finley Fraher takes full advantage of the garden view.
Above: With the doors open, a car can pull in and park in the courtyard (you can roll aside the wooden planters, which are on wheels, before parking).
Can you spot the garden’s electric-car charging station?
Above: A blue front door and matching window trim (painted in Farrow & Ball’s Hague Blue) is identical to the color scheme in the courtyard garden. Photograph courtesy of Fraher Architects.
Are you designing a small city courtyard garden of your own? For inspiration, see our Garden Design 101 guides to Patios & Decks, Fences & Gates, and Pavers. See more of our favorite small courtyard gardens:
An outdoor faucet needs to be durable. It must stand up to direct sun, dry weather, wet weather, and snow—year after year. So it should be made of solid metal, something non-corrosive like stainless steel, and have a utilitarian appeal.
We also prefer outdoor faucets to be on the lower end of the pricing spectrum, and most are. Here are 1o of our favorites.
Above: The Jalco 10-Inch Deck-Mount Single Hole Swivel Bar Faucet is one of many of the brand’s faucets designed for outdoor sinks. It’s typically priced on the higher end of the pricing spectrum at $1,575. Contact Jalco for dealer information.
Above: Sold as a unit, the Dutch outdoor kitchen design company WWOO makes a stainless steel sink that comes with their own outside tap (the WWOO Buitenkraan). Together the two are €699 at WWOO.
Move the garden indoors this winter, with terra cotta planters on metal stands. “Sometimes in life, the simple things are best,” notes retailer Rockett St George.
The trio of planters will show off to great advantage vines, climbers, and trailers. Let the foliage drape gracefully to the floor, like a skirt on a ball gown:
For an object lesson on how to create a charming first garden on a tight budget, we take you to a small backyard in London’s Crofton Park neighborhood. There food writer Mina Holland and musician Freddie Denham-Webb have created an oasis in the city—complete with an American-style Big Green Egg grill.
What prompted the American barbecue invasion? “We’re on a street of what I figure were quite experimental Victorian houses. Ours is a purpose-built maisonette, and opposite there are cleverly laid-out cottages. It feels like it was a bit of a testing ground for small-space living,” Holland recently told The Modern House.
Here’s everything you need to steal the look:
Above: From inside, a view of the dining table and benches is framed by the open doorway. The small garden also has a storage shed at the edge of the property. Photograph courtesy of The Modern House.
Above: The industrial-style light fixture above the door came from a friend: “He and his partner moved to a very stylish Sixties development in Hatfield, and this didn’t quite go with their refit. We love it, though,” says Holland. Photograph courtesy of The Modern House.
Exterior & Facade
Above: The brick facade and trim is painted with Pure Brilliant White by Dulux to reflect light and make the space look clean and bright.
Above: The back door and transom window are painted in Farrow & Ball’s Green Blue.
Farrow & Ball’s exterior paints are available in both eggshell and gloss finishes.
Lighting
Above: With a galvanized finish, The Original Warehouse Gooseneck Light can be customized with five sizes of shades, a straight or gooseneck arm (varying lengths are available ) and a wire cage. Prices start at $189 at Barn Light Electric.
Garden Shed
Above: A similar 10-by-8-foot peaked from Wooden Traditional Garden Summerhouse with shiplap siding has double doors with four window panels; £829.99 from Amazon UK.
Paint the shed to match the house, as Mina Holland did, to give the garden a cohesive look.
Fence
Above: Painted black, horizontal fence privacy panels are tall enough to provide a neutral backdrop to the garden. For similar, a five-pack of Grange Contemporary Slatted Fence Panels is £470 from DIY.
Above: The Big Green Egg charcoal grill is available in seven sizes, including a Mini Max intended for countertop use. Included is a “precision temperature gauge that provides accuracy up to 750 degrees Fahrenheit/400 degrees Centigrade,” notes retailer Green Acres; $639.
Above: A Bier Garden Set includes an 86.6-inch-long table and two benches. It is available in nine finishes including natural with black legs as shown; $439 from Beer Garden Furniture.
The table seats sits comfortably. Says Holland: “We have a lot of friends over, but we tend not to invite more than four at a time, so there’s six of us. That might change in summer because the garden feels like we have an extra room.”
Above: Made in the UK, Haws’ galvanized Slimcan Metal Outdoor Watering Can has “a removable oval brass spray nozzle to adjust your pour to whatever garden or terrain you’ve got,” notes retailer Goop; $120.
Above: From New England Pottery, a 12.25-inch-high Terracotta Planter is a classic strawberry planter, with openings that make it easy to pick fruit. It is $29.98 from Lowe’s. For UK readers, a terra cotta Strawberry Pot with an extra-wide neck, made in Turkey, is £54.99 from Crocus.
Plants
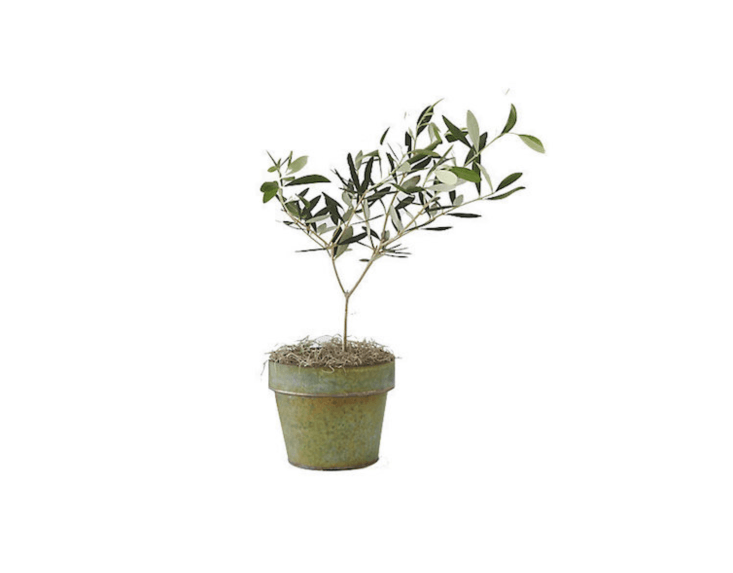
In addition to a kitchen garden with herbs and strawberries, the courtyard has ornamental flowering plants, including lupines, daisies, and jasmine vines. In pots are olive tree topiaries (an olive tree is a good container plant, as it can withtand dry or windy conditions).
Above: A similar 14-inch-high live Olive Tree (in a woven grass pot, not shown) is $48 from Terrain.
Above: Wild Perennial Lupine Seeds (available in quantities of from 1,000 to 5,000 seeds for from $12.75 to $45.75 depending on quantity from Maine Simple via Etsy) will bloom in spring with colorful flower spikes in shades of blue and purple, with some pink and white.
To create a meadow effect, scatter wildflower seeds in tilled earth.
Are you furnishing an outdoor space? See our Steal This Look archives for ways to make it comfortable and stylish. Read more:
Our town is what many would call quaint. With a population of around 25,000, it’s not small, but it still manages to have a small-town feel. When a Starbucks moved into our village center last year, there was a lot of hand-wringing and calls to support our local businesses. It’s that kind of place—where people are passionate about mom-and-pop stores and actually walk to get places and make regular eye contact, to boot.
So we were surprised when we moved here to find that many of our neighbors hired professional landscapers to mow their lawns. There are no McMansions here. Most lawns are compact-sized and don’t take an inordinate amount of time to mow. So why were so many of our down-to-earth neighbors outsourcing their lawn-mowing?
When fall came a few months later, we discovered the reason. Our neighbors weren’t just throwing away money (and their ideals) for the heck of it, they were paying for a whole regimen that included regular mowing, yes, but also, more importantly, aerating, overseeding, and fertilizing. And fall is prime time for putting this regimen to action.
Should we be following the lead of our neighbors who have their lawns on programs? How much attention does our lawn need anyway now that temperatures are dropping? I asked Missy Henriksen, vice president of public affairs for the National Association of Landscape Professionals, for some advice.
Q: Now that it’s fall, can you stop mowing and watering?
Above: Don’t say good-bye to your lawn mower for the winter just yet. Your lawn may need a couple more trims before it goes dormant for the winter. See this manually operated mower from Manufactum and others like it in 10 Easy Pieces: Reel Lawn Mowers.
A: Short answer, no. “There’s a misconception that the lawn care season starts in the spring. It actually starts the previous fall with proper aeration, overseeding, fertilizing, mowing, and watering,” says Henriksen. Depending on where you live, you should continue to mow your lawn until late October to mid-November (those in the south and warm climates may never get a break). How short should it be? Keep grass cut to a height of between two and two and a half inches. “Avoid the temptation to mow too closely.” she advises. “As long as the lawn is green, it’s making food that it will store down in the roots for use next season.”
As for watering, don’t slack off on that chore either. “One way to know when to stop watering is to go by the leaves. After the leaves drop to the ground, it’s a sign that homeowners should give trees and shrubs one final deep watering,” says Henriksen. Doing so ensures that the “root systems will have time to absorb moisture from the soil as it soaks down before freezing temperatures set in. Gradually reduce the amount of water applied as fall progresses so that the plants have the opportunity to acclimate to the coming winter weather.”
A: Bad news for those who love shortcuts and hacks. According to Henriksen, you can’t just neglect your lawn and hope for the best. “Looking at lawns in human terms, we get pretty grumpy if we miss a meal, and we will not stay healthy for very long if we are deprived of water. Lawns are no different,” she says. “Fall aeration, overseeding, and fertilizing all work together in creating a healthy lawn and landscape. Aeration provides an excellent bed for overseeding, and fertilizing helps boost the new and established grass created during the overseeding process.”
A: First, aerate. Aeration involves poking the soil with small holes to allow air, water, and nutrients to reach the grass’s roots. You can rent an aerator, as my husband did our first fall in the burbs, but it’s not for the fainthearted or weak-muscled (he never did it again). Follow with overseeding. “Overseeding is done by broadcast spreading or using a slice seeder, a machine that mechanically places the seed in the soil,” says Henriksen. Last, follow with fertilizer “to give new and established grasses a boost.”
Q: Is overseeding necessary if your lawn has no bare patches?
A: To paraphrase Henriksen, overseeding is a must. (She is tough!) “Each year, a certain percentage of the grass on your lawn simply reaches the end of its lifespan. Others succumb to insects, disease, or exposure to extreme environmental conditions such as heat or drought. Unless you plan to replace these dead plants, other plants such as weeds and native grasses will fill these voids in your lawn.” Furthermore, she says that researchers are constantly improving the performance of grasses that we use in our lawns. “These are the plants you want growing in your lawn, and overseeding at the time of aeration is a quick and efficient way to introduce them.”
Q: What about fertilizers?
A: Wait, let me guess. It’s a nonnegotiable? “Most soils do not provide enough of the proper nutrients plants need, so fertilizing gives grass the extra boost of the nitrogen they need to be healthy,” says Henriksen. “Fertilizing is a science and requires a bit of math. The only way to know what type of fertilizer your soil needs is to have it tested for levels of nutrients. Your lawn care company can perform soil testing and interpret the analysis for you.”
For more fall landscaping tips and information, Henriksen suggests visiting LoveYourLandscape.org, the NALP’s educational website for consumers.
Garden shears are an essential tool. Whether you’re shaping a boxwood ball into an ethereal cloud or simply trying to tame the blades of grass alongside a driveway, a sharp pair of long blades is the key to success. Here is a list of our favorite garden shears and trimmers for precision clipping:
Above: Japan-based designer Daisuke Tajika carries on the family tradition started by his great grandfather in 1928. His 13-inch forged steel Long Landscaping Shears are ideal for shaping hedges and cutting through dense growth; $325 from Nalata Nalata.
Above: A pair of Forged Hedge Trimmers with beechwood handles have chrome-plated carbon steel blades for extra strength. A serrated edge cuts even a single blade of grass cleanly. A pair of trimmers is €76 from Manufactum.
Above: From Hiroshima-based Okatsune, “this short, lightweight model is ideal for topiary boxwood or the Japanese garden (o-karikomi), because you are close to the work,” notes the manufacturer. Handles measure 30 centimeters (about 12.8 inches long) and the blades are 175 millimeters (approximately 7 inches long). A pair of Okatsune 217 is €84.95 from Okatsune Europe.
Above: “Ideal for box clipping, topiary, and other delicate jobs,” says Jake Hobson of Niwaki, a UK-based purveyor of high-quality Japanese garden tools. A pair of Masanume Shears Short has Aogami Blue Paper Steel blades and white oak handles; £124.17 from Niwaki.
Above: From Burgon & Ball, a Precision Shear has an ergonomic design to prevent gardener’s fatigue. A pair is £34.95 from Amazon UK.
Above: A pair of Okatsune Shears No. 60 are ideal for clipping yew and boxwood hedges: “Blades are made of hot hammer-forged Izumo Yasuki Steel, which is used in Japanese swords—giving them maximum sharpness and cutting power.” A pair is $129.69 from Amazon.
Above: From a family-run company based in Germany, Berger Hedge Shears measure 32 inches and have chrome-plated forged aluminum blades to resist rust. A pair is $88 from Terrain.
Above: With carbon steel blades and ergonomically designed handles, a pair of Jakoti Hand Shears is the right tool for many jobs: trimming ornamental grasses, deadheading, shaping topiary, and clipping shrubbery. A pair is £29.99 from Handshears.
Above: A pair of Berger Waved Hedge Shears “feature a self-sharpening design plus a waved shape to keep branches from slipping,” notes retailer Terrain; $68.
Above: With a handle that rotates 90 degrees, a pair of Grass Trim-Shears made in Italy can cut “grass growing right up to the edges” of a path or driveway; $24.30 from Garrett Wade.
In a historic neighborhood just southwest of Boston, the grounds of a Mediterranean-style estate had much to recommend them. A sweeping lawn, mature specimen trees, a quiet reflecting pool, and a quaint pond all enhanced the stately atmosphere of the early 20th-century home. But the landscape had none of the transitional areas prized by modern families: no zones for outdoor living, entertaining or recreation.
Enter Richard Burck Associates, Inc. and Robert Hanss, Inc., the landscape architect and construction team that the owners asked to update the historic estate. Their vision was two-fold: enhance the feel of old-world grandeur and relaxed elegance that the grounds already possessed, while also creating a timeless landscape fit for modern living.
Bob Hanss, whose team today is responsible for maintaining the landscape, noted: “This was a grand, and very old garden…with great older plantings and so much unique character. Respecting the history that was there was important. It was a chance to revive an older, historic estate for needs of the 21st century.”
Above: Matching the scale and architecture of the house, the pool feels as if it has always been there.
One of the first elements that Burck and Hanss added was a grand pool which runs the length of the elegant lawn. Intentionally minimal, it provides a focal point, leading the eye toward the house from one end, or toward the large pines when viewed from the opposite end.
Above: Viewed from the house, the pool is framed by tall pines that serve as a transitional element from the more formal lawn shown here to the woodland and pond below.
Above: Its edges flush with the ground, the pool blends seamlessly into the lawn.
Hanss noted that, though it had much potential, the landscape of the estate was “wildly overgrown,” requiring the removal of invasive plants and the rejuvenation of many old specimen trees. New plantings were restrained and restricted in palette, allowing the architecture of the landscape to take center stage.
Above: The two terraces created a much-needed transitional space between the indoors and out.
To provide more outdoor living space and create a softer transition between the house and garden, Burck and Hanss developed a series of pea stone terraces along the back of the house. The lower patio accommodates a generous outdoor dining area. The upper terrace features two seating areas on either side of the central entrance. Each is framed by low walls constructed of older stone that add texture and enhance the old-world feel.
Above: Relaxed outdoor furnishings reflect the casual elegance of the garden.
Above: Plantings and garden accents such as agapanthus and urns maintain the Mediterranean feel.
Above: The house, terraces, and pools are laid out in complementary planes, which are then softened by lush and wild plantings.
Pockets along the edges of the stone terrace provide spaces for plantings, which are deliberately informal and loose. Vines are encouraged to spread, yews are minimally clipped, and plants are left to self-seed, to soften the hardscaping. Adding to the overall romance of the terrace, a trellis of rather fecund wisteria and grape vines also provides ample shade.
Above: Old stones interplanted with mosses and creeping ground covers make the newly constructed wall seem age-old.
Above: Strategically placed throughout the terraces, container gardens with exotic plantings such as succulents and cycads enhance the Mediterranean flavor.
Above: Framing a hand-hewn stone path, loosely shorn yews, as well as untamed vines and self-sewn plantings, conjure an atmosphere of old-world charm.
Above: Along the steps, artemisia and lavender echo the Mediterranean architecture.
Above: At one end of the pool, the original reflecting pool and fountain was restored and enhanced with an old limestone trough.
Above: Below the lawn and pool a winding path leads to a man-made pond that was created in the 1920s. Here Bob’s crew restored the wetland landscape by clearing invasive species and planting natives such as willow, high-brush blueberry, and swamp azalea.
Above: A paired of lichen-covered deck chairs provides a quiet spot to rest by the pond.
Above: Flanked by ferns and mature rhododendrons, the front entrance of the house maintains a stately appearance.
Inspired to add a little old-world romance into your garden? Take a tour of some of our favorites: